Google Analytic Tracking Help
As Google Analytics is a service provided by Google, it is best that you get familiar with what Google Analytics is all about by visiting http://www.google.com/analytics.
With earlier versions of FlipViewer Xpress Creator you will have to perform the traditional way of adding the tracking code. However, FlipViewer Xpress Creator now comes with a simple feature for you to simply add the Tracking ID and the Creator will do the adding the tracking code for you at the relevant file(s).
Getting Started
You could enable your FlipBooks to be tracked by Google Analytics by following the steps below:
1. Sign Up an account of Google Analytics with your Google account. Then login to your Google Analytics account.
2. Assuming you are going to upload all your FlipBooks to a particular site (eg http://www.abc.com/FlipBooks), you only need to create a single website profile. If you upload some of your FlipBooks to other websites (http://www.xyz.com/FlipBooks), you will need to create multiple website profiles.
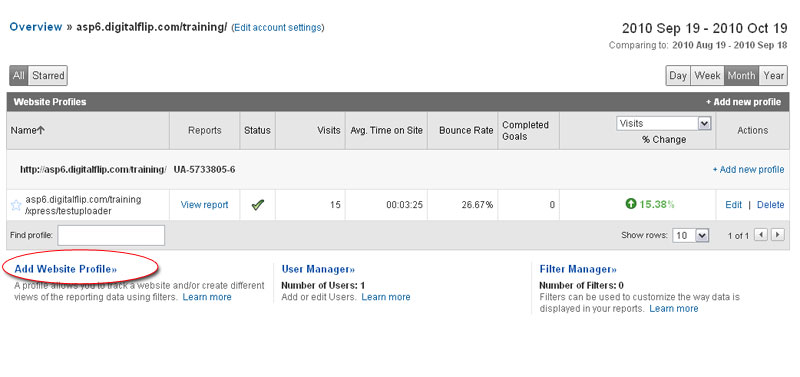
(a) Choose the option “Add Website Profile”.
(b) Choose the option “Add a Profile for a new domain”. Enter the URL of the folder that hosts your FlipBook as the site you would like to track. Change the Time Zone to your time zone.
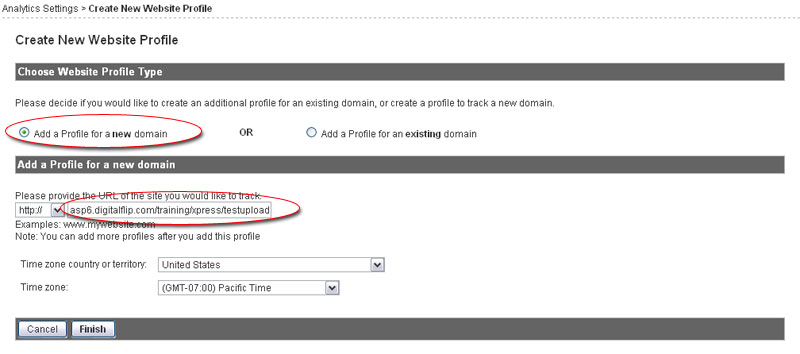
(d) Click the “Finish” button.
3. At the end of creation of new website profile, you'll be given a tracking code (Web Property ID), something like the following, except the string in the bracket is unique for each website profile: _gat._getTracker("UA-5733805-7")
![]()
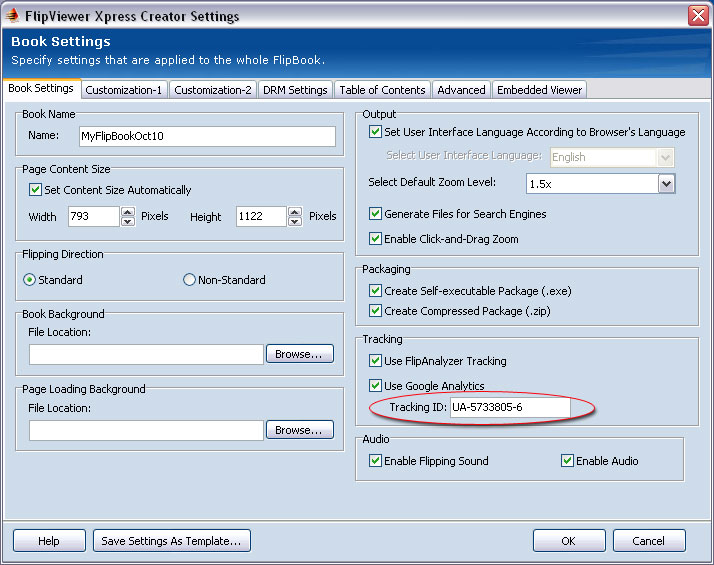
4. Copy the Tracking ID (Web Property ID) (e.g. UA-5733805-6) and launch FlipViewer Xpress Creator. Going through the normal process of starting a project by inserting your source files, you will come to the settings. In the Book Settings tab, select the Use Google Analytics check box and then enter the Tracking ID. Proceed with the rest of the settings and publish your FlipBook. FlipViewer Xpress Creator will add the relevant tracking codes into the HTML page that launches the FV Xpress FlipBook, i.e. "flipviewerxpress.html".
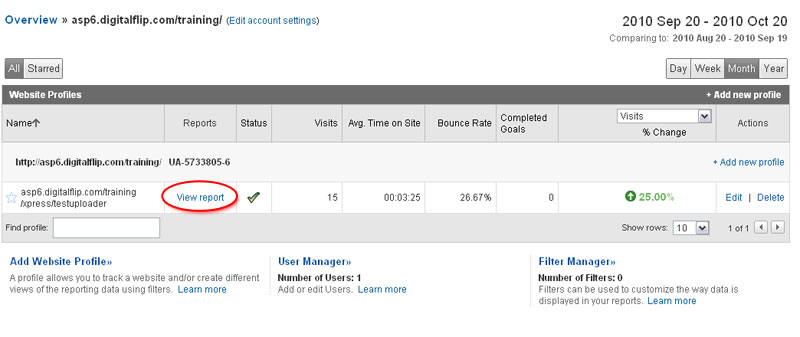
5. Google Analytics generally updates your reports every 24 hours. This means that it could take 24 hours for data to appear in your account after you have first installed the tracking code. To view the Google Analytics Report for a FlipBook, click the "View Report" link of the corresponding website profile.
View Report
To view your GA report, below are the steps.
Login to your Google Analytics account. Choose “View Report” beside the website profile that stores your FlipBooks.
To View “Page View” report:
1. Choose “Content” -> “Content by Title”. Then choose a book title under “Page Title”.
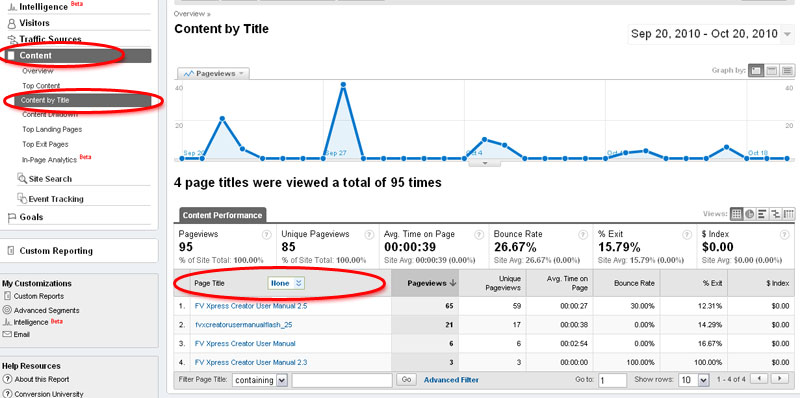
2. Then you will see the next page. In the next page, you will see number of page views for each page in your book as follows.
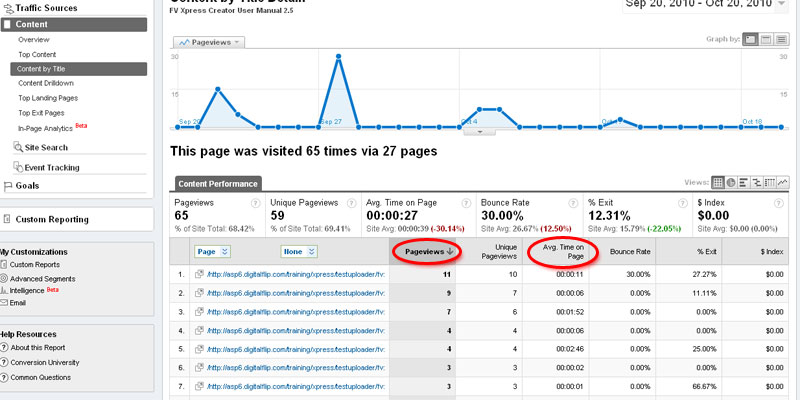
a) You will see number of page views for each page of your FlipBook under “Pageviews” column.
b) You will see average time spent for each page of your FlipBook under “Avg. Time on Page” column.
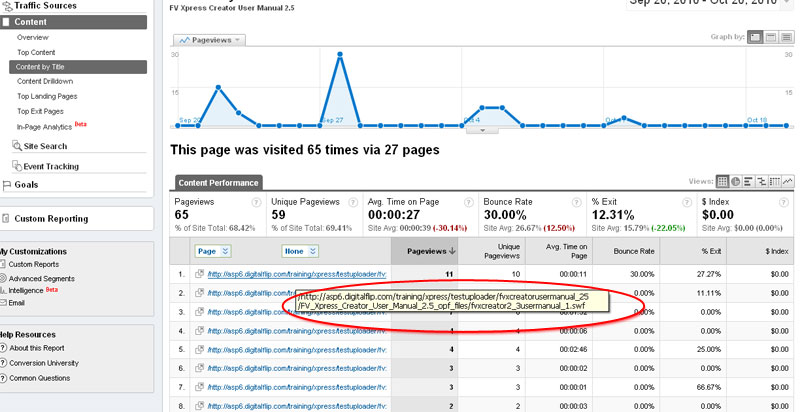
c) You can mouse-over the URL under “Page” column to see the full URL in tooltips (as shown below). This is the URL of your page in FV Xpress FlipBook.
To View “Click-Through” report:
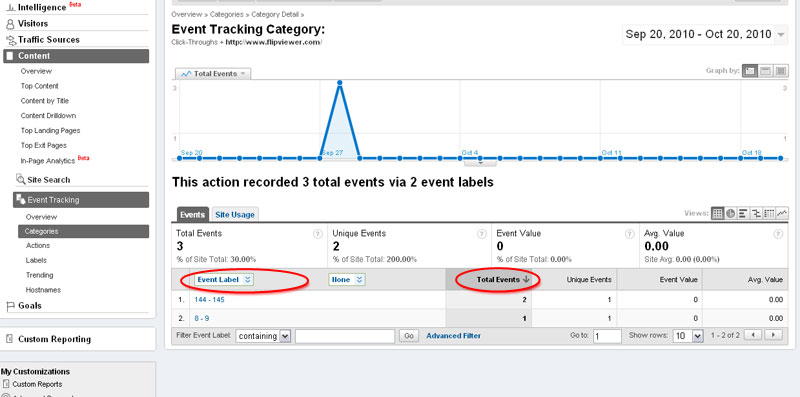
1. Choose “Event Tracking” -> “Categories”. Then choose a book under “Event Categories”. If your Book Name is “MyFlipBookOct10”, choose the book “Click-Throughs-MyFlipBookOct10” under “Event Categories”.

2. Then you will see the next page. In the next page, you will see the links that are clicked in your FlipBook under “Event Action” column. You can see how many times each link is clicked under “Total Events” column.
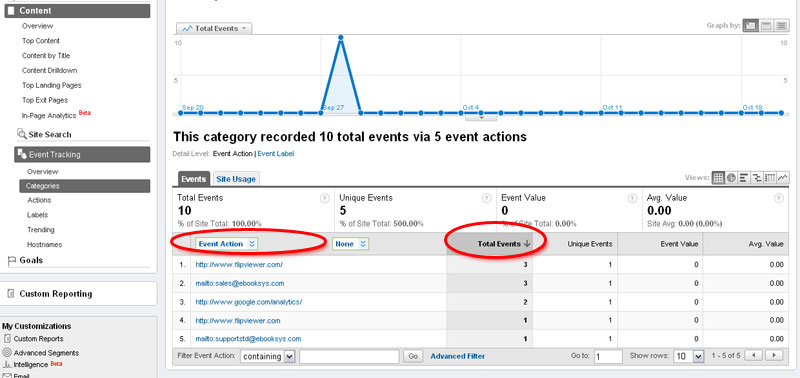
3. Click at each link under “Event Action” column and you will see the next page. In the next page, you will see the link appears in which pages (based on page numbers) in your FlipBook under “Event Label” column and how many times the link is clicked under “Total Events” column.
Modified Date: 21st October 2010